Living Room Acoustics: Renters Can Fix Echo Before Buying Panels

The quickest way to improve living room acoustics is to add soft surfaces, treat the first reflection points on your walls, and adjust speaker or seating placement before buying anything else. Approved Document E sets the acoustic standards that underpin this advice, and panels from suppliers such as Thepanelandpapercompany give you an affordable way to finish the job. Expect noticeable clarity gains; stubborn bass problems usually need thicker treatment or several fixes working together.
TL;DR:
- A thick rug with heavy underlay often cuts reverberation more than treating other surfaces; add curtains and bookshelves gradually, listening after each change.
- Use a mirror from your usual seat to locate side wall and ceiling reflection points, then treat those spots before covering broad areas.
- Bass buildup is strongest in corners, while thin felt mainly controls flutter echo; choose thicker mineral wool or dense foam for lower midrange.
- Renters can use adhesive felt, tension rod curtains, or freestanding screens, but acoustic panels reduce indoor echo rather than block sound between rooms.
- The 38% seating rule is only a rough heuristic; trust listening tests, and seek professional measurement for vaulted rooms or uneven bass across seats.
Table of Contents
- How living rooms behave acoustically
- Quick, high-impact fixes you can try this weekend
- Renter-friendly and no-drill options
- Where to place acoustic treatments for the biggest effect
- Choosing panels and materials for a living room
- Practical evidence behind this advice
- Maintenance and cleaning of acoustic wall panels
- Benefits of professional acoustic consultation and measurement tools
- Integrating acoustics with interior design from day one
- Recommended panels for your living room, and how to try one first
- FAQ
- Sources
How living rooms behave acoustically
Every living room has an acoustic fingerprint shaped by three things: how long sound lingers, where it bounces first, and how bass builds up in corners. Understanding these helps you work out which fix actually matches your problem, rather than guessing.
Reverberation time, known as RT60, measures how long it takes a sound to decay by 60 decibels after the source stops. In a living room, a shorter RT60 means dialogue stays intelligible and music sounds tighter rather than smeared. Hard floors, bare walls and large glass windows push RT60 up, which is why open-plan rooms with wood flooring often sound harsher than a cluttered, carpeted snug.
Early reflections are the sound waves that bounce off a nearby wall, ceiling or window before reaching your ears, arriving shortly after the direct sound. These matter more than distant reflections because your brain struggles to separate them from the original signal, which blurs speech and smears stereo imaging. Finding the first reflection points on your side walls and treating just those spots delivers a disproportionate improvement for the effort involved, as outlined in this practical acoustics guide.
Bass behaves differently. Low frequencies form standing waves, called room modes, between parallel walls, and they pile up hardest in corners. This is why bass can sound boomy in one corner of the sofa and thin elsewhere: you are sitting in a different part of the standing wave pattern. Parallel walls and symmetrical rectangular rooms tend to produce the strongest modal problems, while irregular layouts spread the issue more evenly.
- Shorter RT60 improves speech clarity and reduces the “boxy” sound common in bare rooms.
- First reflection points on side walls and ceiling cause the most audible smearing and are the cheapest to treat.
- Room modes concentrate bass energy in corners, causing uneven low-end from seat to seat.
- Parallel, hard-surfaced walls are the worst combination for both reflections and modal bass.
Research into museum acoustics found that making floors more absorbent typically delivers the single largest improvement in reverberation, while ceiling treatment gives the biggest gains in speech intelligibility, and walls are the most effective tool for controlling privacy between spaces, according to acoustics research. That hierarchy translates directly to a living room: start at floor level, move up to the ceiling for clarity, then use walls for anything you want contained.
Approved Document E sets formal acoustic performance requirements for separating walls and floors between dwellings, along with methods for calculating absorptive material needed in shared areas. It is aimed at construction compliance rather than living room décor, but the underlying principle holds: measuring and testing a specific room beats applying a fixed rule borrowed from a different space entirely.
Quick, high-impact fixes you can try this weekend
Before buying anything, work through your existing furniture and soft goods. Most living rooms already contain the raw materials for a meaningful acoustic improvement.
- Lay a thick rug with a heavy underlay over any hard flooring, since floors tend to produce the largest single drop in reverberation of any surface in the room.
- Move your sofa away from the back wall and rearrange it so it faces away from the hardest, flattest surface in the room, breaking up a direct reflective path.
- Hang heavy, lined curtains over any glass, keeping them closed during listening or viewing sessions rather than just at night.
- Scatter cushions and throws across sofas and chairs to add irregular soft surfaces that scatter rather than reflect sound.
- Fill open bookshelves with books of mixed sizes and depths, plus the odd ornament, so the shelf acts as a natural diffuser rather than a flat reflective panel.
Each step compounds the last. A rug alone softens footstep noise and some mid-range slap; add curtains and the room stops sounding “live” during conversation; add a well-stocked bookshelf and you get genuine diffusion rather than just absorption, which keeps the room from sounding dead. This guidance on everyday acoustic fixes backs rugs, curtains and bookshelves as practical, low-cost tools precisely because they double as furnishings you would want anyway.
Change one element at a time and listen before moving to the next. Play a podcast or a familiar track, note how sharp or muddy it sounds, then add the rug and listen again before touching the curtains. This stops you over-treating a room or masking one fix’s effect with another, and it tells you exactly where your remaining budget should go.
Pro Tip: Clap sharply in the middle of the room: a harsh, ringing echo signals you need more absorption, while a flat, dead thud means you may already have enough.

Interior design research backs this furniture-first approach directly: upholstered sofas, rugs and bookcases offer meaningful natural absorption and should be weighed up before committing to a full panel layout, according to acoustic design guidance. Treating the room as a single system, rather than bolting panels onto a problem you have not diagnosed, tends to produce better results for less money.
Renter-friendly and no-drill options
Not everyone can drill into a rented wall, and not everyone wants to. Fortunately, several acoustic treatments work entirely without fixings.
- Removable PET felt panels use a peel-and-stick or Command-strip style adhesive, giving genuine absorption without marking paintwork.
- Self-adhesive fabric tiles work similarly and come in enough colours to match most wall schemes.
- Tension-rod curtains fitted over a window recess or even a flat wall section add soft mass without a single screw.
- Freestanding absorber screens, similar to portable room dividers, can sit directly behind a television or speaker pair and be moved whenever you rearrange the room.
- Ceiling-hung fabric “islands” use removable hooks rated for plasterboard, letting you suspend absorptive panels above a seating area without a permanent fixing.
For a renter-friendly starting kit with styling guides built around no-drill installation, this guide to reducing living room echo without drilling covers adhesive PET felt panels designed specifically for tenancies, including layout advice for awkward room shapes.
The trick to making removable treatment look deliberate rather than temporary is to treat it as decoration first. Choose a felt colour that matches a cushion or rug already in the room, hang panels in a considered grid rather than a single random square, and group freestanding screens with a plant or lamp so they read as furniture. If you are in a longer tenancy and the landlord is open to it, a small number of permanent panels near the television wall is often worth negotiating, since fixed panels sit flatter and can use denser, more effective cores than peel-and-stick alternatives.
Where to place acoustic treatments for the biggest effect
Panel placement matters more than panel quantity. A handful of panels in the right spots will outperform a wall covered at random.
- Sit in your usual listening or viewing position and have someone slide a mirror along the side wall; wherever you can see the speaker or television reflected in the mirror from your seat marks a first reflection point worth treating.
- Repeat the mirror check on the ceiling directly between your seat and the screen or speakers, since this spot carries early reflections just as strongly as the side walls.
- Place your first acoustic panels in the room’s corners, since this is where bass energy concentrates most heavily and where absorption has the biggest effect on room modes.
- Add a ceiling panel, sometimes called a ceiling cloud, centred above the main seating area to control the upper-frequency reverberation that a flat ceiling tends to reflect straight back down.
- Once first reflection points and corners are covered, extend treatment to the back wall behind the main seating position, which is the next most audible reflective surface in most living rooms.
Pro Tip: Treat one side wall reflection point first, listen again, then treat the matching point on the opposite wall, this way you can hear the improvement in stages rather than guessing at the combined effect.
Corner bass trapping works because standing waves reach maximum pressure at wall-to-wall junctions, so absorptive material placed there intercepts more low-frequency energy than the same material on a flat wall section. Starting with some corners, rather than every corner in the room, is usually enough to hear a difference before deciding whether more are needed.
There is no fixed percentage of wall area you need to cover, and chasing one risks over-treating an asymmetrical room while under-treating the spots that actually matter. Practical acoustic treatment guidance consistently points back to first reflection points and speaker placement as the starting priority, with additional coverage added only after listening tests show it is needed. For a step-by-step look at sequencing ceiling clouds before corner traps in a typical living room layout, see this home acoustic treatment guide.
Choosing panels and materials for a living room
Panels broadly do one of two jobs: absorption, which removes sound energy, or diffusion, which scatters it. A living room usually needs more absorption than diffusion, since the goal is normally to calm down an overly live space rather than add complexity to an already dead one. Diffusion earns its place on a single feature wall or behind a listening position where you want to preserve a sense of space without adding more flat absorption.
Thickness and core material decide what a panel actually treats. Thicker panels with a mineral wool or dense foam core handle broadband absorption, including the lower-mid frequencies that thin panels miss entirely. Thinner felt panels control high-frequency flutter echo, the fast, metallic-sounding slap you hear clapping in an empty room, but do little for anything below a few hundred hertz.
- Slatted wood panels suit living rooms built around warm, natural finishes and double as a feature wall.
- Fabric-wrapped panels blend into painted walls and come in enough colours to match existing soft furnishings.
- Felt panels work well where a textured, slightly industrial look fits the room, and they install lighter than wood-faced options.
- Matching panel tone to flooring or furniture, rather than wall colour alone, tends to look more deliberate.
Coverage is best approached a sample at a time rather than by a rigid rule. Order one panel, test it at a first reflection point, listen, then decide whether the room needs two more or ten more. Asymmetrical rooms, bay windows and chimney breasts all break the kind of even coverage formula that looks tidy on paper but rarely matches how sound actually behaves in your specific space. If you want to compare finishes before committing to a full wall, the living room wall panel range covers oak, grey and walnut options at a similar price point, letting you test a finish against your existing décor before scaling up.
Practical evidence behind this advice
Our panel range, sold through Thepanelandpapercompany, focuses on residential acoustic wall panels priced to make this kind of room-by-room testing realistic, backed by WhatsApp support for quick fit questions and a warranty on every panel. A common seating-position heuristic works as a rough starting point at best: every room’s dimensions, furniture and wall materials shift the ideal spot, so iterative listening tests consistently beat a fixed formula. Readers who treat first reflection points and corners first, then add panels gradually, tend to report the steadiest, most noticeable improvements.
Maintenance and cleaning of acoustic wall panels
Fabric-wrapped and felt panels mostly need a light vacuum with a soft brush attachment every few weeks to stop dust settling into the surface texture, which is the main cause of a dulled, grey appearance over time. A dry microfibre cloth handles light dust on wood-faced panels, while a slightly damp cloth with a mild, non-abrasive cleaner lifts most marks without affecting the finish.
Avoid soaking any acoustic panel, since trapped moisture in a foam or mineral wool core can affect both the material and its acoustic performance over time. Steam cleaners and strong solvents are best avoided on fabric-faced panels, as they can flatten the pile and change how the surface absorbs sound.
Check adhesive-mounted panels every few months if you are in a renter-friendly setup, since humidity and temperature swings can loosen peel-and-stick fixings faster than screwed installations. A quick press back into place usually resolves this, though panels in bathrooms or kitchens are worth checking more often given the higher moisture levels. Keeping panels out of direct, prolonged sunlight also helps fabric and wood finishes keep their original colour for longer.
Benefits of professional acoustic consultation and measurement tools
A professional acoustic consultation adds genuine value when a room’s problems are subtle, such as uneven bass between seats or a persistent flutter echo that furniture and panels have not resolved. Measurement tools, from a simple smartphone RT60 app to a calibrated sound level meter, let you quantify reverberation before and after a change rather than relying on memory, which is notoriously unreliable for judging small acoustic improvements.
For most living rooms, the clap test and a mirror check for first reflection points get you most of the way without paid help. Where a consultation earns its cost is in open-plan spaces with mixed uses, rooms with unusual geometry such as vaulted ceilings, or any space where a home cinema setup needs genuinely even bass response across several seats. A consultant can also help translate a measured RT60 into a specific panel count and placement plan, which removes much of the guesswork from a larger treatment project.
Integrating acoustics with interior design from day one
Treating acoustics as a decorating decision, not an afterthought, saves both money and regret. Choosing a rug, curtain weight and shelf layout with sound in mind from the start, rather than retrofitting panels around a finished room, tends to produce a better-looking and better-sounding result for the same budget, a point echoed in research on acoustics and interior design. Ordering a sample panel and talking through sizing on WhatsApp before committing to a full wall is a small step that avoids an expensive mismatch later.
— Tayyy
Recommended panels for your living room, and how to try one first
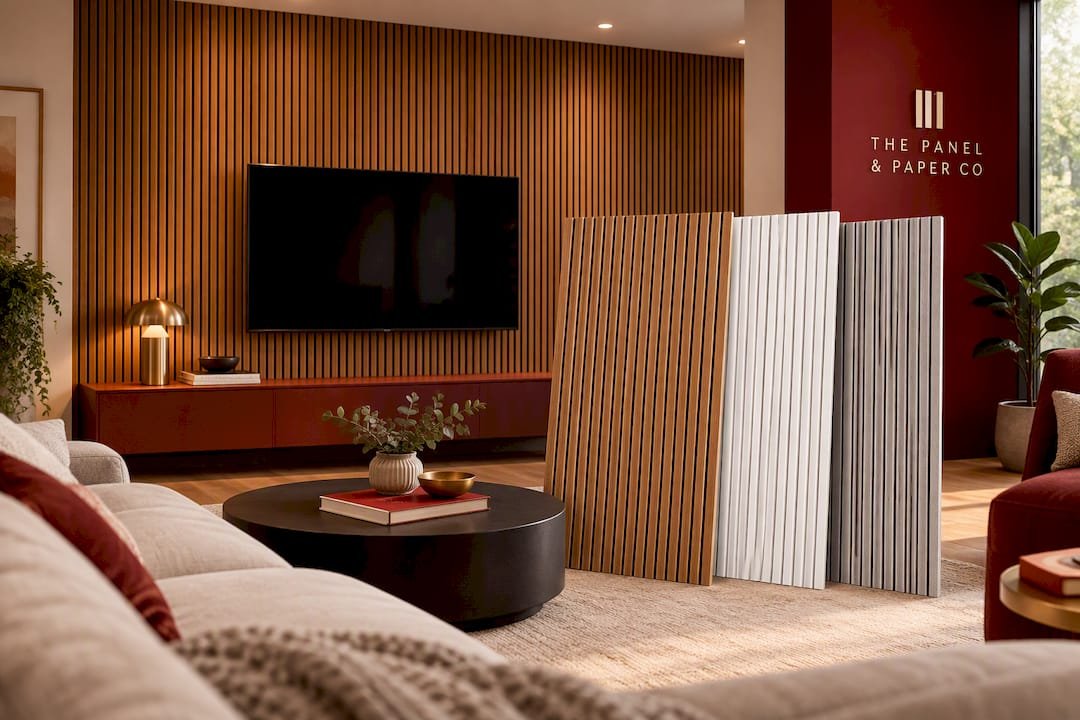
For readers ready to move from furniture fixes to dedicated panels, we recommend starting with a few options from our range, each suited to a different living room style. These are a treatment layer, not a soundproofing solution. For the distinction between reducing echo and blocking sound entirely, see our guide to panels versus soundproofing.
- The Ultra Low Cost Acoustic Panel suits living rooms where you want the panel to read as a feature rather than a fix.
- An Acoustic Wall Panel fits minimalist or Scandinavian-style rooms where you want the treatment to disappear into the wall.
- An Ultra Low Cost Acoustic Panel works as an option that sits comfortably against most existing colour schemes.
Order an acoustic wall panel sample to check the finish against your wall before buying a full set, and message our team on WhatsApp with your room dimensions if you want help deciding how many panels to start with.
FAQ
What is the 38% rule in room acoustics?
A common seating-position heuristic suggests positioning your main listening seat away from the room’s midpoint, treating it as a rough starting point for avoiding the worst bass nulls. It is a heuristic rather than a fixed standard, and listening tests in your specific room remain more reliable than applying it rigidly.
What makes a room have bad acoustics?
Bad acoustics usually come from hard, parallel surfaces that create long reverberation, strong early reflections off nearby walls, and uneven bass caused by room modes in corners. Rooms with lots of glass, bare flooring and few soft furnishings tend to suffer the most.
What is the golden ratio for room acoustics?
The golden ratio refers to room dimension ratios sometimes used to reduce the chance of two room modes stacking on the same frequency, which can make bass problems worse. It is a design consideration for new builds rather than something you can easily change in an existing living room, where furniture and panel placement matter far more.
How can I soundproof my living room?
Acoustic panels and soft furnishings reduce echo and improve clarity inside a room, but true soundproofing, which stops sound travelling between rooms, needs mass and sealed gaps rather than absorptive panels alone. Our guide to panels versus soundproofing explains the difference and which approach suits noise travelling out of your room versus noise bouncing around inside it.
Sources
- How to improve your room acoustics
- Designing Museum Spaces That Sound as Good as They Look
- Guidance Note No. 53
- Rmcad
Recommended
- Apartment Echo: Cheap Fixes First, Sample Panels Later
- UK Renters: Quiet in a Day, Renter Friendly Acoustics and D…
- Acoustic Wall Panels in Rented London Homes
- Acoustic Panels vs Soundproofing
Ready to compare products? Shop waterproof marble wall sheets Shop acoustic wall panels