Free Delivery when you spend £120!

Are Acoustic Wall Panels Suitable for Bedrooms?

Acoustic wall panels can work very well in bedrooms when the aim is to combine a decorative feature wall with some control of sound reflections inside the room. They add vertical texture, can make a plain wall feel more considered and may soften the hard, echoing character of rooms with limited soft furnishings.

They are not, however, a complete soundproofing system. A slatted panel fitted to one wall cannot be expected to stop traffic, neighbours or footsteps travelling through the building structure. The best bedroom installation begins with a clear design goal and an honest understanding of the acoustic goal.

This guide explains where bedroom panels work best, how to choose a finish and what London homeowners and renters should check before ordering.

Why Use Acoustic Wall Panels in a Bedroom?

Bedrooms contain more soft material than kitchens or hallways, so they are not always the most echo-prone rooms. Curtains, carpet, bedding and upholstered furniture already absorb some sound. A panel wall can still be useful where there are large bare surfaces, laminate floors, minimal furniture or an open route into a dressing area.

The main reasons customers choose them are:

  • to create a feature wall behind the bed;
  • to add warmth and texture without patterned wallpaper;
  • to visually frame a bed or dressing table;
  • to reduce some high-frequency reflections within the room;
  • to support a calmer television or music-listening area; and
  • to coordinate the bedroom with panelled spaces elsewhere in the home.

The decorative result is immediate. The acoustic change depends on the room, panel construction, coverage and installation method.

Acoustic Treatment Is Not the Same as Soundproofing

This distinction is essential for bedrooms. Acoustic treatment changes how sound behaves inside a room. Soundproofing aims to reduce sound passing from one room or property to another.

Slatted acoustic panels may help reduce flutter echo and harsh reflections, particularly when a room has hard walls and floors. They do not normally seal the paths through which external noise enters, such as:

  • gaps around doors and windows;
  • lightweight partitions;
  • shared floors and ceilings;
  • ventilation openings;
  • pipe penetrations; and
  • structural connections between adjoining homes.

If sleep is being disturbed by outside or neighbour noise, identify the transmission path before buying a decorative panel. The detailed guide to acoustic panels versus soundproofing explains the difference and helps set a realistic plan.

Is Behind the Bed the Best Position?

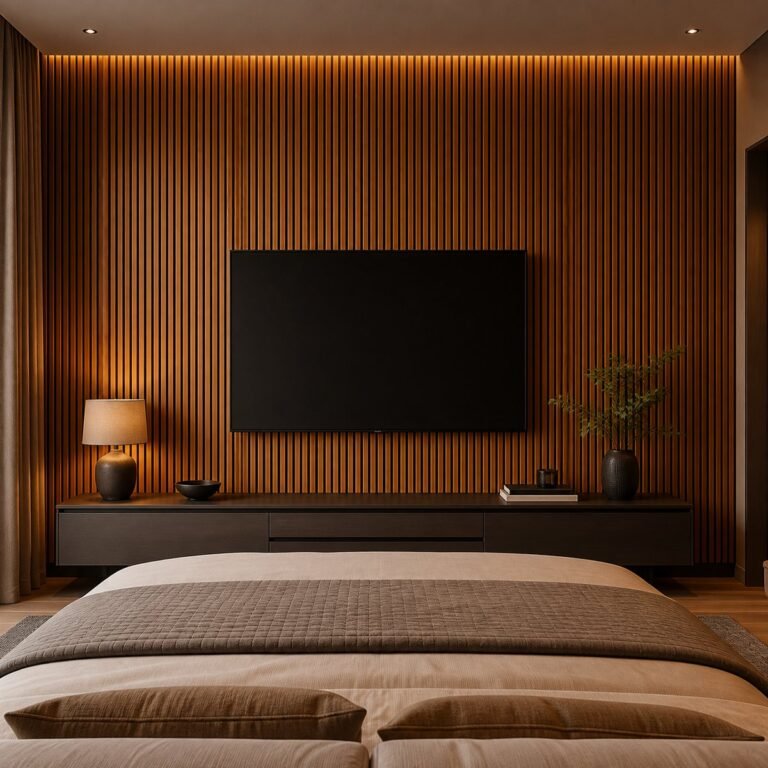
Behind the bed is the most common bedroom location because the wall already acts as a visual focal point. Full-height slats can make the ceiling appear taller, while a panelled zone slightly wider than the bed can create a deliberate headboard effect.

This position works especially well when:

  • the bed is centred on a plain wall;
  • bedside tables and lights can be aligned with the slats;
  • electrical outlets remain accessible;
  • the wall has enough uninterrupted width; and
  • the chosen finish complements the floor and bed frame.

Measure around sockets, switches, radiators, picture rails and skirting before deciding on the layout. Do not assume that a wall is square, particularly in period London properties.

Use the awkward-wall measuring guide where the bedroom includes alcoves, sloping ceilings or chimney-breast returns.

Full Wall or Partial Feature?

A full wall gives the strongest architectural effect. It also increases material coverage, which may provide more useful absorption than a very narrow decorative strip. The trade-off is cost, fitting time and visual weight.

A partial feature can be better when:

  • the bedroom is compact;
  • the selected finish is very dark;
  • the bed is positioned in an alcove;
  • the tenant needs a reversible design;
  • only one section of damaged wall needs to be disguised; or
  • the room already contains several strong textures.

Possible partial layouts include a bed-width section, a floor-to-ceiling strip beside a dressing table or a panelled recess. Keep the boundaries intentional. A panel section ending a few centimetres from a socket or furniture edge can look accidental.

Choosing a Finish for a Bedroom

Colour and grain should be tested in the actual room. Bedrooms are often viewed under warm bedside lamps, which can make pale panels look creamier and deepen brown tones.

Walnut

Walnut introduces warmth and works naturally with cream, beige, olive, navy and black furniture. In a small north-facing bedroom, test it carefully so the wall does not become visually heavy.

Dark Oak

Dark oak creates a more dramatic backdrop and can suit hotel-inspired rooms or media walls. Balance it with lighter bedding, adequate lighting and a clear surrounding wall colour.

Grey

Grey can work with contemporary interiors, upholstered beds and cool-neutral flooring. Check the sample beside the permanent furnishings because grey finishes can shift warmer or cooler under different lamps.

Black

Black or charcoal panels produce strong contrast and can frame a television or bed effectively. They usually benefit from deliberate lighting and lighter adjacent surfaces.

White Oak and Pale Finishes

Pale finishes can make a compact room feel lighter and allow the slat texture to remain visible without dominating the space. Compare the undertone with the floor, wardrobes and wall paint rather than relying on the colour name.

The site’s panel sample comparison guide should be live before this article is published. Test the shortlist in morning daylight, evening light and beside the bedding that will remain in the room.

Lighting Changes the Panel Colour

Warm bedside lamps can enrich walnut and dark oak, while cooler ceiling lights can make grey and pale panels appear cleaner. If LED strips will be fitted between the slats, decide their position and colour temperature before bonding the panels.

Avoid a strip that shines directly into the eyes from the normal sleeping position. Reflections in mirrors, televisions and glossy wardrobes should also be checked.

A useful bedroom test is to temporarily hold the sample at headboard height, switch on only the lamps used at night and view it from the doorway and the bed. That is more informative than examining the sample under a bright shop or phone light.

Will the Panels Collect Dust?

Like shelves, radiators and fabric headboards, slatted panels need occasional cleaning. Dust can settle on horizontal edges, inside deeper grooves or near heating vents.

For routine care:

  1. use a soft brush attachment or microfibre duster;
  2. work gently along the slat direction;
  3. avoid soaking the wood or backing;
  4. test any cleaning product on an inconspicuous area; and
  5. follow the product-specific care instructions.

Bedrooms used by people with sensitivities should be kept well ventilated and cleaned as part of the normal room routine. Do not make medical or allergy-control assumptions based only on the word “acoustic”.

The scheduled cleaning and maintenance guide provides a fuller routine once published.

Installation Checks for Bedroom Walls

Before fitting, identify the wall construction and any concealed services. Bedrooms may have sockets near bedside tables, wall-mounted reading lights or cables routed behind a television.

Check:

  • whether the wall is masonry, plasterboard or another substrate;
  • whether it is dry, sound and reasonably level;
  • the location of electrical cables and pipework;
  • how skirting, coving and picture rails affect the height;
  • whether adhesive or mechanical fixings are suitable; and
  • whether the product instructions require a particular method.

Do not cover a damp wall or use decorative panels to conceal an unresolved leak. Where wiring must be moved or a new electrical connection is required, use an appropriately qualified installer.

For a cleaner cut around sockets and edges, measure twice and work from the visible face specified by the product instructions. Tracker item 7 contains a separate practical guide to cutting acoustic panels and should be linked after it is published.

What Renters Should Consider

Tenants need the property owner’s permission before making permanent changes. Adhesive can damage paint and plaster when removed, while screws create fixing holes.

Possible renter approaches include:

  • asking for written approval for a permanent improvement;
  • using a removable secondary frame where structurally appropriate;
  • panelling a freestanding furniture feature rather than the property wall; or
  • choosing samples and planning the layout for a future property.

Never rely on a social-media “damage-free” claim without checking the product, wall finish and tenancy terms. Read the guide to installing acoustic wall panels in a rented London home before proceeding.

How Much of the Wall Should Be Covered?

For decorative purposes, coverage is a design choice. For acoustic purposes, a larger treated area generally has more potential influence than one narrow strip, but exact room performance cannot be promised from wall area alone.

Measure the actual width and height of the intended section, subtracting only openings that will genuinely remain uncovered. Then calculate using the current product dimensions and add an allowance for cuts or mistakes appropriate to the layout.

Do not calculate from an old product image. Confirm the live dimensions and whether the item is sold as a single panel or a pack.

Browse the current acoustic wall panel collection and use the site’s panel calculator for an initial quantity. Ask for confirmation where the wall includes several returns or unusual cuts.

Frequently Asked Questions

Do acoustic wall panels make a bedroom soundproof?

No. They can help manage some reflections inside the bedroom, but soundproofing requires attention to the construction and routes through which noise travels.

Can acoustic panels be fitted behind a bed?

Yes, provided the wall, fittings and installation method are suitable. Behind the bed is a popular position because it creates a clear feature wall.

Are dark acoustic panels suitable for a small bedroom?

They can be, but lighting and surrounding colours matter. A full dark wall may feel heavier than a partial feature, so test a sample in the room first.

Can tenants install bedroom wall panels?

Only with the required permission. Adhesive and mechanical fixings can alter the wall, so renters should obtain written approval and understand reinstatement requirements.

Are acoustic wall panels difficult to clean in a bedroom?

Routine dusting with a soft tool is usually manageable. Follow the current care guidance for the panel finish and avoid saturating the material.

A Good Bedroom Panel Plan

Acoustic wall panels are suitable for many bedrooms when they are chosen as a decorative surface with realistic acoustic benefits. The strongest results come from a measured layout, a finish checked under bedroom lighting and an installation that respects the wall, services and tenancy conditions.

Start with the intended wall and a current sample. Decide whether the priority is a full feature, a bed-width section or an acoustic improvement inside a hard-surfaced room. Then confirm the current product size, quantity and fitting method before ordering.

If the bedroom has an unusual layout, send clear wall measurements and photographs through the site’s WhatsApp contact for product and quantity guidance.

Warm White vs Cool White LED Lights for Acoustic Wall Panels

LED lighting can change how an acoustic wall panel looks as much as the panel finish itself. The same walnut slats may appear rich and relaxed under warm white light, then cleaner and more neutral under cool white light. On black or grey panels, the choice can shift a room from soft and cinematic to crisp and architectural.

That makes colour temperature a design decision, not merely a choice between two bulbs. Before ordering LED lights for acoustic wall panels, consider the room’s purpose, the existing lighting and the finish you want to emphasise.

This guide explains the practical differences for London homes, media walls, bedrooms, restaurants and commercial interiors.

What Do Warm White and Cool White Mean?

Colour temperature describes whether white light appears warmer and more golden or cooler and more neutral. It is normally measured in kelvin, although the exact specification should always be checked on the current product page or packaging.

Warm white light generally has:

  • a softer, slightly golden appearance;
  • a comfortable evening atmosphere;
  • a close relationship with timber, warm paint and brass details; and
  • less of the clinical feel associated with very bright task lighting.

Cool white light generally has:

  • a cleaner, whiter appearance;
  • stronger visual contrast against black backing;
  • a modern architectural character; and
  • a closer relationship with grey, white, chrome and cooler materials.

Neither option is automatically better. The useful question is which light supports the room and panel finish when the space is actually being used.

When Warm White Works Best

Warm white is often the natural choice for living rooms, bedrooms, lounges and hospitality interiors. It can bring out the brown, amber and honey notes in wood while keeping the room comfortable after dark.

Consider warm white lighting when the room includes:

  • walnut or dark-oak panels;
  • warm neutral paint;
  • beige, cream or brown upholstery;
  • brass, bronze or gold details;
  • timber flooring; or
  • lamps that already produce a warm glow.

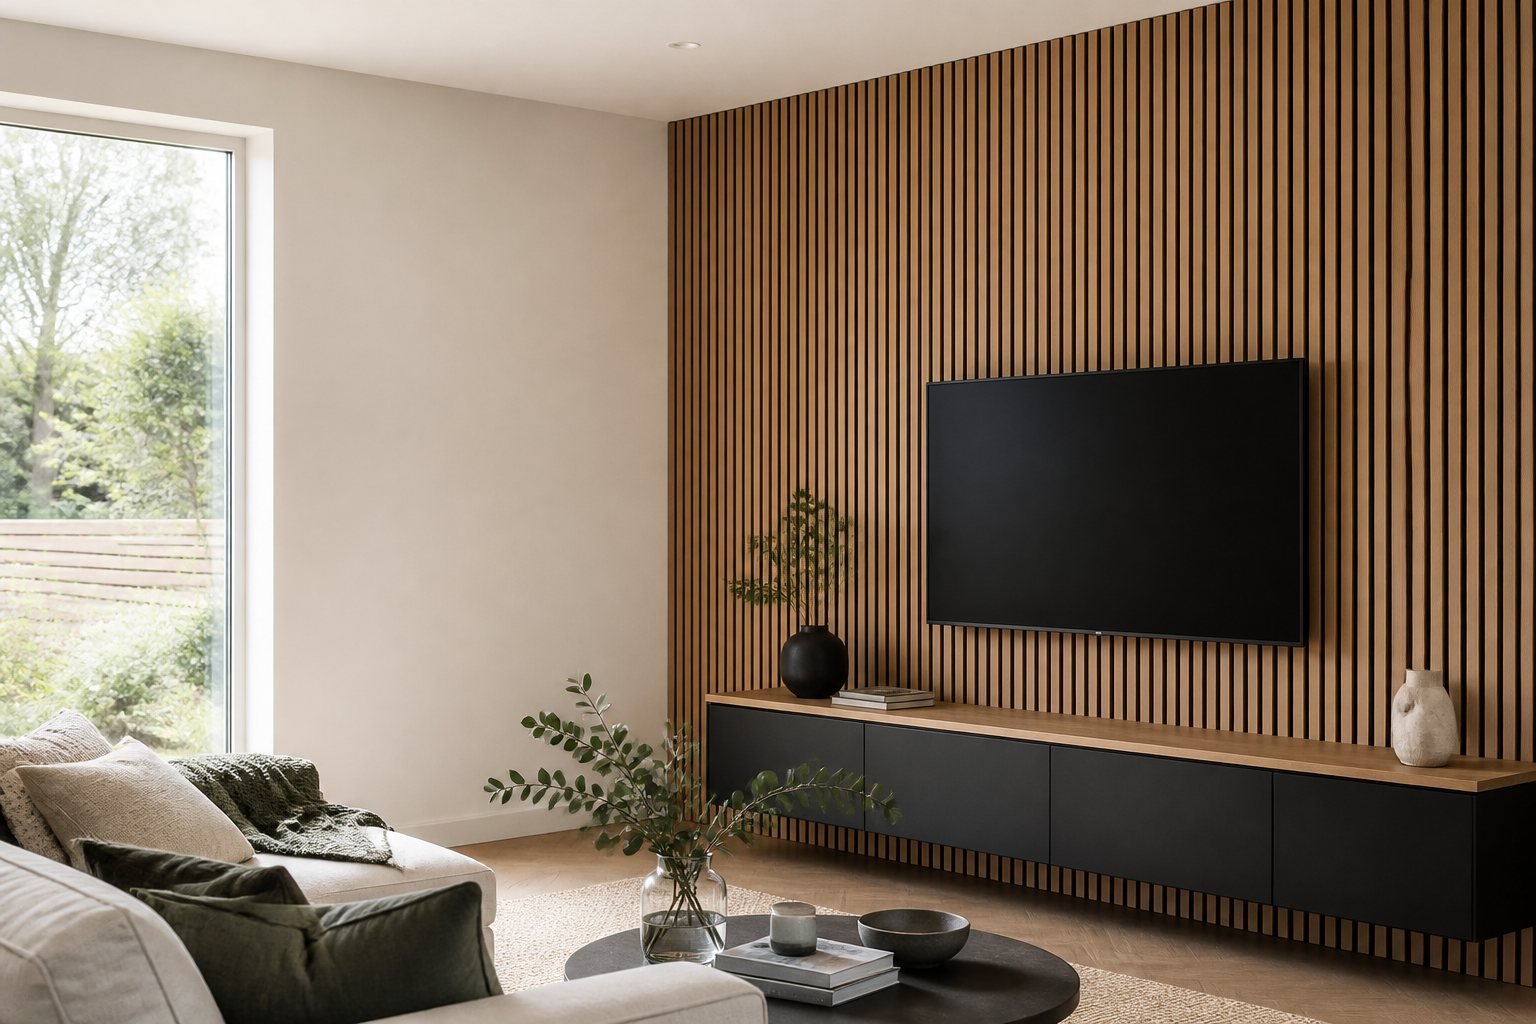
It works particularly well when acoustic panels form a TV or media wall. A softer light can frame the installation without competing with the screen. It can also make the vertical lines of the slats visible without turning them into harsh stripes.

In a London living room that receives limited daylight, warm white may stop dark panels from feeling severe. However, too many warm sources can make pale wood appear more yellow than expected. Test the panel and lighting together before fitting every strip.

When Cool White Works Best

Cool white suits interiors that need a sharper, more contemporary result. It often works with white oak, grey, charcoal, marble-effect panels and chrome details.

Consider cool white lighting for:

  • modern kitchens and open-plan rooms;
  • grey or black acoustic panels;
  • white and cool-neutral walls;
  • home offices;
  • retail displays and reception areas;
  • chrome, silver or glass finishes; and
  • rooms where the LED strips contribute to functional light.

Cool white can increase the apparent contrast between a wood slat and the dark acoustic backing behind it. This can make the panel rhythm look more precise in photographs and in person.

The trade-off is atmosphere. A cool source that is too bright or exposed may feel harsh in a bedroom or evening lounge. The strip position, diffuser and surrounding light matter alongside colour temperature.

Match the Light to the Panel Finish

The panel name is only a starting point. Natural and manufactured finishes reflect light differently, and photographs cannot reproduce every room accurately.

Walnut and Light Oak

Walnut and light-oak tones tend to become richer under warm white. Cool white can reduce some of that warmth and reveal a more neutral grain. Choose based on whether you want a cosy or cleaner effect.

Dark Oak and Black

Warm white can soften dark panels and create a cinema-style media wall. Cool white produces a stronger graphic line and may suit a contemporary office or commercial interior.

Grey and Charcoal Marble

Cool white normally preserves a grey or stone-like impression. Warm white can introduce a softer cast, which may be useful when the surrounding room contains warmer flooring or furniture.

White Oak and Pale Finishes

Pale panels are sensitive to nearby colour. Warm light can make them look creamier, while cool light can make them feel brighter and more neutral. Compare a physical sample in the intended room before relying on a product image.

The site’s guide to comparing acoustic panel samples at home will be the best next step once published. Until then, view a current sample in daylight and under the room’s evening lights.

Think About the Room, Not Just the Wall

A panel installation is part of a lighting scheme. Existing ceiling lights, lamps, daylight and television screens all affect the result.

For a living room, switch on the lights normally used in the evening. For a home office, check the panels during working hours and on video calls. In a restaurant or lounge, test the light at the dimmer evening level rather than only under bright installation lighting.

London properties often combine old and new elements. A period room with modern slat panels may benefit from warm white because it connects the contemporary wall with traditional timber and warm fittings. A new-build apartment with grey floors and white cabinetry may suit cool white more naturally.

Avoid choosing from an LED strip viewed on its own. Place it beside the actual panel sample, wall paint and surrounding materials.

Plan the LED Position Before Installing Panels

The cleanest result is planned before adhesive is applied. Decide where the illuminated lines should begin and end, where cables can be concealed and how the power supply will remain accessible.

Common arrangements include:

  • one vertical strip near each side of a media wall;
  • evenly spaced illuminated lines across a wider feature wall;
  • a single off-centre accent beside a mirror, shelf or television; and
  • lighting around a panelled recess or architectural feature.

More strips do not always create a better wall. A small number of deliberate lines can appear more professional and reduce visual clutter.

Check the current panel dimensions, LED product instructions and electrical requirements before installation. If mains wiring or a new connection is required, use a suitably qualified installer. Do not trap inaccessible connections behind permanently bonded panels.

For panel positioning and cuts, read the practical acoustic panel cutting guide once it is published. For irregular walls, use the existing awkward-wall measuring guide.

Avoid Mixed Whites Unless They Are Intentional

Warm and cool sources in the same view can make an otherwise careful installation look inconsistent. This commonly happens when warm panel strips sit beside cool ceiling spotlights.

Before choosing:

  1. turn on the room’s normal lights;
  2. identify whether they look warm, neutral or cool;
  3. compare the LED option beside them;
  4. check the panel finish in the combined light; and
  5. photograph the result using a neutral camera setting.

Matching every source exactly is not mandatory. A deliberate accent can work, but an accidental mismatch is much harder to correct after installation.

Control Brightness and Glare

Colour temperature receives most of the attention, but brightness and visibility of the LED source are equally important. A very bright strip can create glare on a television, glossy furniture or marble surfaces.

Aim for a fitted result where the light supports the slats rather than hiding their texture. Where the product system allows it, a suitable diffuser or recessed profile can produce a more continuous line. Confirm compatibility before buying components from different systems.

In bedrooms and lounges, softer output is usually easier to live with. In a showroom or workspace, a brighter line may be appropriate. Test from the normal seated or standing position, not only from directly in front of the wall.

Browse the Current LED Light Options

The Panel & Paper Company currently lists panel lighting including the LED wood panel strip light and premium four-pack black LED light strips.

Use the live product pages to confirm:

  • the current light colour option;
  • pack quantity;
  • dimensions and compatibility;
  • installation requirements;
  • stock status; and
  • current price and delivery information.

Do not rely on an older social-media image or blog price. Product details can change, while this guide is intended to help with the design decision.

Frequently Asked Questions

Is warm white or cool white better for a media wall?

Warm white often creates a softer cinema-style atmosphere, while cool white gives a sharper modern outline. The better choice depends on the panel colour, surrounding lamps and how the room is used at night.

Which LED colour works with walnut acoustic panels?

Warm white commonly emphasises the richer tones in walnut. Cool white can make the same finish appear more neutral. Test both beside a current panel sample if colour accuracy matters.

Which LED colour works with grey or black panels?

Cool white tends to create crisp contrast with grey and black. Warm white can soften dark finishes and feel more comfortable in a lounge or bedroom.

Can I mix warm and cool white lights on one wall?

You can, but the difference should be deliberate. Mixed whites can look inconsistent when they are close together, particularly in photographs or beside a television.

Should LED lights be installed before or after acoustic panels?

The lighting route, power access and strip positions should be planned before the panels are fixed. Follow the current product instructions and use a qualified installer where electrical work requires one.

Make the Choice in the Actual Room

Warm white supports comfort and timber warmth. Cool white supports contrast and a cleaner architectural feel. The final decision should be made beside the selected panel, with the room’s normal lights switched on.

If you need help matching a current panel finish to one of the available LED light kits, send a clear room photograph and the product name through the site’s WhatsApp contact before ordering.

How to Compare Acoustic Panel Samples in Your London Home

A screen can help you shortlist an acoustic wall panel colour, but it cannot show exactly how that finish will look in your room. Phone brightness, photography, editing and surrounding colours can all change the appearance of wood tones, grey finishes and dark slats.

A physical sample gives you a more reliable comparison. The useful test is not simply whether the sample looks attractive in your hand. It should be viewed on the intended wall, in the room’s real light and beside the materials that will remain after installation.

This guide explains a practical way to compare acoustic panel samples before ordering full-size panels for a London home or commercial interior.

Start With the Room, Not the Colour Name

Names such as walnut, dark oak, white oak, grey and black are useful labels, but they are not universal colour standards. Two products with similar names can have different undertones, grain patterns and surface reflectivity.

Begin by recording what already exists in the room:

  • the direction and strength of natural light;
  • the colour of the floor;
  • permanent joinery, doors and window frames;
  • large furniture pieces;
  • wall paint that will remain;
  • warm or cool artificial lighting; and
  • metals used for handles, sockets and light fittings.

For a broader explanation of how finishes behave in different schemes, read the acoustic panel colour guide for London interiors.

Check Samples on the Intended Wall

Do not judge every sample on a table near the window. Hold or temporarily position it against the actual wall where the panels may be installed.

A finish can appear lighter against a dark painted wall and deeper against a white wall. It may also look different on a wall facing a window compared with a wall running alongside it.

Test the sample at approximately eye level and near the lower part of the wall. If the installation will extend behind a television, headboard or dining table, check it beside that object as well.

Use removable low-tack tape only if it is safe for both the sample and the wall finish. Do not leave a sample unsupported where it could fall, and test any tape in an inconspicuous place first.

View Each Finish at Different Times of Day

London rooms often experience large changes in light between morning, afternoon and evening. A north-facing room may stay comparatively cool, while a south- or west-facing wall can become much warmer in direct sunlight.

Compare the shortlist in at least three conditions:

  1. normal daylight;
  2. the room’s main evening lights; and
  3. any task or decorative lighting that will be used near the feature wall.

Warm bulbs can emphasise honey, red or golden undertones. Cooler bulbs can make pale oak and grey finishes appear crisper. Dark finishes may show more reflection where spotlights are close to the wall.

Compare Undertones, Not Just Light and Dark

Place two or three samples side by side. Look for the colour beneath the obvious surface tone.

A wood finish may lean:

  • yellow or golden;
  • red or orange;
  • neutral brown;
  • grey or muted; or
  • deep brown approaching black.

Grey samples can also lean warm, cool, green or blue depending on the surrounding room. A finish that looks neutral on a white website background may reveal a clear undertone beside your floor.

If the room already contains several wood finishes, the new panel does not always need to match them exactly. A deliberate contrast can work well.

Use a Small Material Board

Create a simple comparison board using materials already present in the room. Include:

  • a flooring offcut or clear photograph;
  • the wall paint colour;
  • a cabinet, door or worktop sample;
  • curtain or upholstery fabric; and
  • metal finishes such as brass, chrome or black.

Place each acoustic panel sample beside the group and remove any option that creates an unwanted clash.

For kitchens, bathrooms and commercial interiors, also consider whether nearby surfaces are reflective, heavily patterned or exposed to moisture. Standard indoor acoustic panels should only be used in locations allowed by their product instructions. A visual match does not make a product suitable for a wet or exterior area.

Look Beyond the Decorative Face

The sample should help you examine more than colour. Check:

  • the consistency of the surface finish;
  • visible grain or pattern scale;
  • the colour and texture of the backing;
  • the contrast between slat and felt;
  • the spacing between slats;
  • the edge appearance; and
  • how the material reacts to normal handling.

A small sample may not show the complete pattern repeat or the joins between full panels. Check full-size photographs and dimensions too.

If sound treatment is part of the decision, remember that a decorative sample does not demonstrate the performance of a completed wall. Installation method, coverage, wall construction and the exact product specification all matter. The guide on acoustic panels versus soundproofing explains that distinction.

Narrow the Choice to Two Finishes

Comparing too many options for too long can make the decision harder. After the first room test, remove finishes that clearly conflict with the scheme.

Keep the best two samples on the wall for a day or two if practical. View them from the doorway, the main seating position and the route used most often through the room.

Ask:

  • Does one finish make the room feel noticeably darker?
  • Which sample works with both daylight and evening lighting?
  • Does the grain compete with another strong pattern?
  • Will the finish still suit the room if smaller accessories change?
  • Which option creates the intended contrast with the floor and furniture?

The answer should reflect the complete room rather than the sample that looks most dramatic close up.

Check the Product Details Before Ordering

Once a finish is chosen, confirm that the sample corresponds to the exact full-size product. Check:

  • product name and colour;
  • current panel dimensions;
  • pack or single-panel quantity;
  • price and stock status;
  • indoor or exterior use;
  • fitting guidance;
  • compatible trims and accessories; and
  • the returns and delivery information shown at checkout.

Do not order solely from an old screenshot or a colour nickname. Use the current product page and ask for clarification if two names appear to describe a similar finish.

Browse the current acoustic wall panel collection after the room test, then use the awkward-wall measuring guide if the installation includes alcoves, sloping ceilings or uneven corners.

Frequently Asked Questions

Should I order a sample before buying acoustic wall panels?

A sample is especially useful when colour, grain and room lighting are important to the decision. It reduces reliance on how a finish appears on a phone or computer screen.

How long should I test a panel sample in the room?

Try to view the shortlist during daylight and under the room’s normal evening lighting. Keeping the final two choices in position for a day or two can reveal changes that are easy to miss in a quick comparison.

Can a small sample show the complete panel pattern?

Not always. A sample shows the local finish and material, but a full panel may have a wider grain or pattern repeat. Check full-size product photography and dimensions too.

Should the panels match my floor exactly?

An exact match is not required. A clear contrast can look deliberate, while two slightly different finishes with similar undertones can sometimes appear accidental. Compare both options in the finished room.

Can I rely on the colour name alone?

No. Colour names are helpful identifiers, but they are not universal standards. Confirm the exact product and inspect a current sample where possible.

Make the Final Choice With Real-Room Evidence

The strongest sample comparison uses the intended wall, the room’s changing light and the permanent materials around it. That process is more reliable than selecting a finish from a single product image.

Once you have narrowed the choice, send a photograph of the wall and the shortlisted finish through the site’s contact or WhatsApp route if you need help checking the product name, quantity or fitting accessories before ordering.

Can Acoustic Wall Panels Be Cut to Size?

Most wood slat acoustic panels can be trimmed to fit the width or height of a wall, but the correct method depends on the exact product construction. A panel may combine decorative slats, a surface finish, a core material and acoustic felt. Each layer behaves differently when it is cut.

That means the useful question is not only, “Can this panel be cut?” It is also, “Where should the cut fall, which face should be marked, and how will the exposed edge be finished?”

This practical guide explains the planning principles for London homes and commercial interiors. Always check the instructions supplied with your exact panel before choosing a blade, tool or fixing method.

Confirm the Panel Construction First

Do not assume that every slatted panel is made in the same way. Products can differ in:

  • slat width and spacing;
  • wood veneer, laminate or foil surface;
  • core material and density;
  • felt thickness;
  • panel dimensions;
  • edge shape; and
  • recommended cutting tools.

Some cuts pass only through the felt between two slats. Others pass through the full slat and backing. Cutting through a gap is usually simpler, but the wall dimensions and final slat rhythm do not always allow it.

If a product includes metallic, marble-effect, flexible or exterior materials, use the instructions for that range rather than copying a method intended for a standard indoor wood slat panel.

Measure the Finished Wall, Not Just the Empty Space

Measure the wall at more than one point. Older London properties can have ceilings, floors and corners that are not perfectly square.

Record:

  1. the wall width at the top, middle and bottom;
  2. the height at several positions;
  3. skirting boards, coving and dado rails;
  4. sockets, switches and cable outlets;
  5. radiator brackets, shelves and television mounts; and
  6. corners, chimney breasts, alcoves and sloping ceilings.

Use the smallest relevant dimension and include the expansion or fitting tolerance recommended for the product. Do not force a panel into a tight opening.

For irregular rooms, follow the detailed awkward-wall measuring guide before creating a cutting plan.

Plan the Slat Pattern Before Making a Cut

A technically accurate cut can still look wrong if it leaves a very narrow slat at the visible edge.

Lay out the full wall on paper first. Decide where the first panel starts, how the slat spacing continues across panel joints and what will happen at the final corner. Where possible, balance the two outside edges instead of placing a full panel at one end and a thin offcut at the other.

Also consider the main viewing angle. A cut edge beside a curtain or internal corner may be less noticeable than one beside a doorway.

Number the panels on the rear in installation order. Marking 1, 2, 3 and so on is particularly useful when several pieces are cut around a media unit, staircase or chimney breast.

Choose Tools for the Actual Material

The required tool depends on the cut and panel specification. Common installation tools may include:

  • a tape measure and sharp pencil;
  • a reliable square or straight edge;
  • clamps and a stable work surface;
  • a fine-tooth hand saw or suitable powered saw;
  • a sharp utility knife for felt where appropriate;
  • masking tape to help protect a finished face;
  • a file or fine abrasive for an approved edge treatment; and
  • eye, hearing and dust protection.

Never choose a blade only because it is already fitted to the saw. The tooth pattern, cutting direction and speed can affect chipping.

Read the tool and panel instructions. If you are not confident using a powered saw, ask an experienced installer or carpenter to make the cut.

A Careful Cutting Sequence

The following sequence is a planning framework rather than a replacement for product-specific instructions.

1. Recheck the measurement

Measure twice and compare the planned piece with its actual position on the wall. Mark which side of the line is waste.

2. Mark a square line

Use a proper square or long straight edge. Extend the mark across every slat involved in the cut and onto the rear felt where needed.

3. Protect the finish

If approved for the product, low-tack masking tape can help make the line easier to see and reduce surface marking. Test tape on an offcut first and remove it carefully.

4. Support the complete panel

The panel should not hang over an unsupported edge while the last slats are being cut. Support both the finished piece and the waste section so neither drops, twists or tears the felt.

5. Make the cut without forcing the tool

Let the correct blade do the work. Forcing a saw can create heat, chipping and an uneven line. Keep hands clear and follow the tool manufacturer’s safety instructions.

6. Separate or trim the felt carefully

Where the construction allows, the felt may need a separate clean cut with a sharp blade. Protect the surface beneath it and keep the blade moving away from your body.

7. Dry-fit before applying adhesive

Place the cut panel against the wall before any permanent fixing. Check the gap, slat alignment, edge condition and access around fittings.

The site’s UK acoustic panel installation guide covers the wider fitting sequence.

Cutting Around Sockets and Switches

Electrical positions need careful planning. Measure each opening from two fixed edges and transfer the dimensions to the rear of the correct panel.

Before removing a socket or switch faceplate, isolate the electrical circuit and confirm it is safe. Electrical alterations, extensions and uncertain wiring should be handled by a qualified electrician.

The opening should be accurate enough for the faceplate to cover the cut without hiding damage or leaving unsafe gaps. Remember that a panel changes the finished wall thickness, so the fitting may require an appropriate extension or adjustment.

Do not bury junctions, ventilation openings or equipment that must remain accessible.

Sloping Ceilings, Stairs and Uneven Corners

For an angled cut, make a rigid template from card or another suitable sheet material. Test the template against the wall before transferring it to the panel.

Avoid measuring a complex angle with only one diagonal dimension. A template records the shape more reliably, especially around loft ceilings, stair strings and old plaster corners.

Where a corner is visibly uneven, a planned trim can produce a cleaner finish than attempting to copy every small variation with the panel edge.

Finish the Exposed Edge

Decide on the edge treatment before cutting. Depending on the panel and location, the finish may use:

  • a matching trim;
  • a painted or prepared return;
  • a carefully positioned full slat;
  • an internal or external corner detail; or
  • a hidden edge against joinery.

Do not apply varnish, oil, paint or filler to a finished panel unless the manufacturer confirms that it is suitable.

Common Cutting Mistakes

Avoid these preventable problems:

  • cutting before checking the panel orientation;
  • measuring only one side of an uneven wall;
  • forgetting which side of the line is waste;
  • using a coarse or damaged blade;
  • allowing the panel to vibrate or hang unsupported;
  • cutting all pieces from one measurement;
  • forgetting the depth added around sockets and brackets;
  • applying adhesive before dry-fitting; and
  • leaving the exposed edge detail until the installation is nearly complete.

Frequently Asked Questions

Can acoustic wall panels be shortened?

Many standard wood slat acoustic panels can be shortened, but confirm the exact product instructions and use a tool suitable for every layer in the panel.

Can I cut between the slats?

Some width adjustments can be made through the felt gap between slats. The available gap and final edge still need checking, and this does not solve every wall dimension.

Which side should face upwards when cutting?

That depends on the saw, blade direction and panel finish. Follow the tool and panel instructions and test the complete method on an offcut first.

Can acoustic panels be fitted around sockets?

Yes, where the product and wall allow it, but the opening must be measured accurately and the electrical installation must remain safe and accessible.

Should I cut every panel before installation?

Usually it is safer to work in installation order and recheck the wall as you go. Small variations can change the size needed for later pieces.

Plan Before You Order

A good cutting plan starts with accurate measurements and a confirmed panel construction. Browse the current acoustic wall panel collection and use the panel calculator for an initial quantity estimate.

For help with an irregular London wall, send a front-facing photograph and measurements through the site’s contact or WhatsApp route before ordering.

How to Clean and Maintain Wood Slat Acoustic Panels

Wood slat acoustic panels are designed to make a room feel warmer, more considered and more comfortable to use. Like any visible interior finish, however, they look their best when dust and marks are dealt with before they build up.

The good news is that routine acoustic panel care is usually straightforward. You do not need specialist machinery or aggressive cleaning products. A soft cloth, a suitable vacuum attachment and a careful approach are enough for most homes, offices and commercial interiors.

This guide explains how to clean wood slat acoustic panels safely, what to avoid and how often to inspect them. It is written for customers across London and surrounding areas, where roadside dust, cooking residue and busy commercial use can all affect how often a feature wall needs attention.

What Are You Actually Cleaning?

A typical wood slat acoustic panel has two visible elements:

  • the decorative slats or wood-effect surface; and
  • the dark acoustic felt between and behind the slats.

These materials should not automatically be treated in the same way. The slat surface can usually be wiped gently, while the felt is better cleaned with dry methods. Excess moisture can soak into porous materials, leave water marks or affect adhesives and finishes.

Before using any cleaner, check the care information supplied with your exact panel. If you are unsure which product or finish you have, send us a clear photo on WhatsApp before applying anything.

A Simple Weekly or Fortnightly Dusting Routine

For most living rooms, bedrooms, hallways and home offices, light dusting every one or two weeks is enough.

Start at the top of the wall and work downwards. This stops loose dust falling onto an area you have already cleaned. Use a clean, dry microfibre cloth and wipe in the direction of the slats rather than dragging across them.

A soft duster can also work, but avoid tools with rough plastic edges. On taller walls, use a clean extendable duster and keep the pressure light.

London properties close to busy roads, building work or frequently opened windows may collect dust more quickly. In those rooms, shorter but more frequent cleaning is normally easier than allowing a visible layer to develop.

How to Vacuum the Felt Between the Slats

The felt gaps can trap fine dust that a flat cloth cannot reach. Use a vacuum cleaner with a soft brush attachment and reduce the suction if your machine has an adjustable setting.

Move the brush slowly along the gaps without pressing hard into the felt. Do not use a bare hard-plastic nozzle, because it can mark the slats or pull at the surface.

Vacuuming is particularly useful for:

  • panels behind a television or media unit;
  • hallway and staircase installations;
  • office meeting rooms;
  • restaurant or reception feature walls; and
  • rooms where pets are present.

If the panel edge is exposed, clean that area carefully too. Dust often gathers at horizontal edges, around sockets and where panels meet skirting boards.

How to Remove Fingerprints and Small Marks

For a light fingerprint or surface mark, begin with the least aggressive method.

  1. Wipe the area with a clean, dry microfibre cloth.
  2. If the mark remains, lightly dampen a second cloth with clean water.
  3. Wring the cloth out thoroughly so it is damp, not wet.
  4. Test an inconspicuous section first.
  5. Wipe gently in the direction of the finish.
  6. Dry the area immediately with a separate soft cloth.

Never spray water or cleaner directly onto the wall. Applying liquid to the cloth gives you more control and reduces the chance of moisture entering the joints or felt.

For a stubborn mark, ask the panel supplier before using detergent, alcohol, bleach, furniture polish, solvent or an abrasive cleaning pad. A product that is safe on one finish may dull, stain or discolour another.

Cleaning Panels Near Kitchens

Panels used near kitchens may collect airborne grease as well as dust. Prevention matters here.

Keep slatted panels a sensible distance from direct cooking splashes, steam and high heat. Use effective extraction while cooking and wipe fresh marks promptly. A decorative acoustic panel should not be treated as a waterproof splashback unless the product is specifically sold for that use.

If you are deciding between products for a kitchen, bathroom or another moisture-prone room, choose a material designed for the environment rather than relying on a coating or cleaner later.

For other planning considerations, read our guide to acoustic wall panels versus soundproofing. It explains what decorative acoustic panels can and cannot be expected to do.

What Not to Use on Wood Slat Acoustic Panels

Avoid the following unless the exact product-care instructions expressly approve them:

  • soaking-wet cloths;
  • steam cleaners;
  • bleach or strong disinfectant;
  • abrasive sponges or scouring pads;
  • solvent-based cleaners;
  • silicone-heavy furniture polish;
  • stiff brushes;
  • high-pressure cleaning; and
  • excessive vacuum suction on the felt.

Do not sand, varnish, oil or repaint a finished panel without confirming that the surface is suitable. Altering the finish can produce an uneven result and may affect warranty coverage.

A Monthly Inspection Takes Only a Few Minutes

Cleaning is also a useful opportunity to inspect the installation.

Look for:

  • movement at the panel edges;
  • loose fixings;
  • gaps that have appeared between panels;
  • damage around sockets, switches or television brackets;
  • persistent damp or condensation;
  • marks caused by furniture rubbing against the slats; and
  • lifting trim or adhesive failure.

If a panel appears loose, do not simply add more adhesive to the visible edge. The right repair depends on the wall type, fixing method and condition behind the panel.

Customers planning a new installation can use our awkward-wall measuring guide to account for corners, slopes, alcoves and openings before ordering.

Care in Busy Commercial Interiors

Restaurants, salons, offices, hotels and reception areas usually need a more frequent routine than private homes. High footfall means more dust, fingerprints and contact from chairs, bags or cleaning equipment.

A simple maintenance record can help:

  • dust or vacuum weekly;
  • inspect high-contact areas monthly;
  • photograph damage before attempting a repair; and
  • keep spare offcuts or finish details for future matching.

Cleaning staff should be told that the feature wall is not a tiled or painted surface. A short care note prevents an unsuitable general-purpose spray from being used by mistake.

Protecting the Panels Over Time

Good day-to-day habits reduce cleaning work.

  • Leave a small gap between furniture and the panelled wall.
  • Avoid placing wet coats, umbrellas or mops against the panels.
  • Use kitchen extraction where cooking residue may travel.
  • Deal with leaks and condensation at the source.
  • Keep candles and high-heat appliances at a safe distance.
  • Save the product name, colour and order details in case a matching panel is needed later.

Colour can also affect how visible dust and marks appear. Our guide to the best acoustic wall panel colours for London interiors explains how lighting, room size and existing finishes influence the choice.

Frequently Asked Questions

Can I wipe acoustic wall panels with water?

Use as little moisture as possible. For a small mark, a thoroughly wrung-out cloth may be suitable after testing a hidden area, but the felt should normally be cleaned dry. Never soak the panel or spray it directly.

Can I use furniture polish?

Not unless the care instructions for the exact finish approve it. Some polishes can leave a glossy patch, attract dust or change the colour.

How often should acoustic panels be cleaned?

Lightly dust most domestic installations every one or two weeks and inspect them monthly. Busy commercial rooms, kitchens and roadside properties may need more frequent attention.

Can damaged slats be repaired?

Minor surface marks may be manageable, but cracked, swollen or badly damaged slats can require panel replacement. Send a photo before attempting sanding, filling or refinishing.

Do acoustic panels need professional cleaning?

Usually not for routine dusting and light marks. Professional advice is sensible when there is water damage, widespread staining, loose panels or uncertainty about the surface material.

Need Advice About Your Panels?

The safest cleaning method depends on the exact finish and the type of mark. If you bought from The Panel & Paper Company, send us a clear photo on WhatsApp and tell us where the panel is installed.

If you are still choosing a finish, browse our acoustic wall panels or order samples before committing to a full wall. We can also help estimate quantities for London and surrounding areas.

Acoustic Wall Panels for Hallways and Staircases: London Design Guide

Hallways and staircases are often the first spaces visitors see, but they can be difficult to decorate. They are narrow, busy and full of doors, corners and changes in height. Acoustic slat panels can add warmth and texture while helping to soften the hard, echoing character common in London entrance halls.

Walnut acoustic wall panels for a London hallway or staircase

Why hallways often sound echoey

Entrance halls usually contain hard floors, plaster walls, glass and relatively little soft furniture. Sound reflects between those surfaces, particularly in tall Victorian properties and open stairwells. Acoustic backing can absorb part of that reflected energy while the timber slats create a more finished feature wall.

Decorative panels are not full soundproofing. If the aim is to stop sound travelling between floors or neighbouring properties, read our guide to acoustic panels versus soundproofing.

Choose the safest feature wall

Select a wall that does not reduce the clear width of the route or interfere with handrails, doors, alarms, radiators and switches. In communal buildings and shared escape routes, confirm fire and building-management requirements before installing any decorative finish.

A long wall opposite the staircase can create a strong visual line. In a compact hallway, a smaller panel section behind a console table or coat area may be more practical.

Vertical panels make the space feel taller

Vertical slats emphasise ceiling height and suit narrow London halls. They also create a consistent direction when the wall continues beside a staircase. Horizontal installation can make a long corridor feel wider, but it normally creates more joins and requires careful alignment around corners.

Measuring a staircase wall

Stair walls rarely form one rectangle. Draw the wall, divide it into rectangular and triangular sections, then calculate each area separately. Measure the stair angle, landings, skirting, handrail brackets and any change in ceiling height.

Use our detailed guide to measuring awkward walls for acoustic panels. Allow additional material for angled cuts because some offcuts will not be reusable.

Plan panel edges at landings and corners

A visible edge should look deliberate. End at an internal corner, door frame or planned trim rather than leaving a thin strip in the middle of a wall. Where the panels turn a corner, decide whether the slats continue or finish with a neat edge profile.

Work around handrails carefully

Handrail brackets must remain secure and compliant. Panels add thickness, so brackets may need suitable extension or refixing into the correct structure. Do not attach a safety handrail only to decorative slats or acoustic backing.

Lighting for slatted hallway panels

Wall lights and linear LEDs can emphasise the texture, but side lighting also highlights uneven cuts. Plan the cable route and driver location before installation. Use an electrician for new wiring and avoid covering junctions that must remain accessible.

Best colours for a narrow hallway

White Oak/Premium Oak keeps the space bright and works with pale floors. Grey/Ash Grey suits modern monochrome interiors. Walnut/Light Oak adds warmth to neutral walls. Dark Oak and Black Oak create dramatic contrast but need balanced lighting in a narrow space.

Compare all five main finishes in our guide to the best acoustic wall panel colours for London interiors.

Durability in a busy route

Hallways receive more contact than most rooms. Keep bags, bikes and pushchairs away from exposed panel edges. Use a suitable vacuum attachment or soft cloth for dust, following the product care guidance. A defined skirting detail protects the lower edge from floor cleaning.

Estimate the quantity

Use the panel calculator for rectangular sections, then add the triangular staircase areas and a cutting allowance. Round up to whole panels and keep the grain direction consistent.

Shop hallway acoustic panels in London

Browse our acoustic wall panel collection. For help with a London hallway or staircase, send photographs and labelled measurements through our contact page.

Frequently asked questions

Can acoustic panels go beside a staircase?

Yes, provided they do not obstruct the route, handrail or required safety features. Check shared-building and fire-safety rules where relevant.

How do I calculate a sloping stair wall?

Divide the wall into rectangles and triangles. The area of a triangle is base × height ÷ 2. Then prepare a cutting plan and add waste.

Which finish is best for a dark hallway?

White Oak or another light finish usually keeps a dark hallway brighter, but good lighting and the surrounding wall colour are equally important.

Can You Install Acoustic Wall Panels in a Rented London Home?

Acoustic wall panels can transform a rented flat or house, but tenants should plan the fixing method carefully. The key questions are whether the landlord permits the work, how the wall will be affected and whether the panels can be removed without leaving extensive repairs.

Grey acoustic wall panels suitable for a modern rented London home

Ask for written permission first

Most tenancy agreements restrict alterations, drilling, adhesives or changes to fixtures. Send the landlord or managing agent a short proposal showing the wall, panel finish, fixing method and what will happen at the end of the tenancy. Written approval is safer than relying on an informal conversation.

Leasehold flats may also have building rules, especially where work affects shared walls, fire safety or electrical fittings. Decorative internal panels are usually straightforward, but the property agreement still comes first.

Why direct adhesive is difficult to reverse

High-strength panel adhesive creates a firm installation, but removing it can pull away paint, plaster skim or plasterboard paper. That may be acceptable in an owned property where the wall will remain panelled, but it is rarely the most reversible choice for a short tenancy.

Do not assume an adhesive described as removable will leave every painted wall intact. Paint condition, wall preparation and removal technique all affect the result.

Screw-fixed battens or a removable frame

With permission, a small number of planned mechanical fixings may be easier to repair than adhesive spread across a full wall. One option is to create a timber framework or independent display section and attach panels to it. The design must be stable, safely anchored and suitable for the panel weight.

A competent installer should choose fixings for the wall type. Masonry, plasterboard and stud partitions require different anchors, and hidden cables or pipes must be checked before drilling.

Consider a smaller feature section

Instead of covering the entire wall, use a defined panel section behind a desk, television or headboard. A smaller installation can reduce fixings, material and reinstatement work while still changing the room visually.

Plan the edges so the section looks intentional. Equal margins or alignment with furniture usually appear cleaner than an arbitrary strip.

Do freestanding acoustic panels work?

Freestanding screens and framed absorbers can reduce reflections without permanently covering a wall. They are a useful alternative where the landlord refuses alterations. They do not create the same full-height wood slat feature, but they are easier to move between properties.

Fire safety and escape routes

Do not narrow corridors, block ventilation, cover alarms or interfere with fire doors. In flats with shared escape routes, keep all work within the rented interior and follow building-management requirements. Product suitability depends on the intended location, so ask before using decorative panels near heat sources or protected routes.

Plan sockets and switches

Panels add thickness to the wall. Electrical accessories may require safe extensions or repositioning to sit correctly on the finished surface. This work should be carried out by a qualified electrician where required and agreed with the landlord.

Photograph the room before work

Record the wall condition, existing marks and the approved installation area. Keep the landlord’s permission, installer details and product information. Before moving out, agree whether the panels remain, transfer to the landlord or are removed and the wall reinstated.

Choose a renter-friendly colour

Neutral finishes such as White Oak or Grey can work with several furniture schemes and may be more attractive to a landlord who wants the installation to remain. Read our guide to the best acoustic wall panel colours for London interiors.

Estimate the panel quantity

Use the panel calculator for the approved area. If the wall includes several openings, follow our guide to measuring awkward walls.

Browse panels for your London project

Explore our current acoustic wall panel collection. For help with a removable feature section or permitted installation, send the wall measurements and landlord requirements through our contact page.

Frequently asked questions

Can a landlord keep the panels when I leave?

Yes, if both sides agree. Record the arrangement in writing so there is no dispute about removal or reinstatement.

Will adhesive damage a rented wall?

It can. Strong adhesive may remove paint or wall material, so obtain permission and understand the repair needed before using it.

Can I install panels without drilling?

Some temporary display systems avoid direct wall fixing, but they must still be stable and safe. Choose a professionally designed method for the panel weight and location.

Best Acoustic Wall Panel Colours for London Interiors

The right acoustic wall panel colour should work with your flooring, furniture and natural light while giving the room a deliberate focal point. London interiors range from compact new-build apartments to Victorian terraces and commercial spaces, so the most suitable finish depends on both the room and the atmosphere you want to create.

Walnut acoustic wall panels for a warm London interior

Start with the room’s natural light

North-facing rooms often receive cooler, softer light. A warm wood finish can prevent them from feeling flat. Bright south-facing rooms can carry deeper finishes without appearing too dark. Always compare a finish in daylight and under your evening lighting because warm bulbs can change how the grain appears.

White Oak: also known as Premium Oak

White Oak is a light, versatile finish that suits Scandinavian, minimalist and contemporary rooms. It works well with off-white walls, pale flooring, natural fabrics and black accents. On our range you may also see this tone described as Premium Oak.

Choose it when you want the slat detail to be visible without creating a heavy feature wall. It is especially useful in smaller London flats, hallways and home offices where maintaining a bright feeling matters.

Walnut: also known as Light Oak

Walnut brings warmth and a richer grain to living rooms, bedrooms, restaurants and media walls. In our product naming, Walnut may also be referred to as Light Oak. The alternative name describes the same colour family rather than a different panel.

It pairs naturally with cream upholstery, warm whites, brass details, dark sofas and mid-tone timber furniture. Use neutral surrounding walls to let the grain carry the feature.

Grey: also known as Ash Grey

Grey panels offer a balanced contemporary finish for cool-toned interiors. The same finish may also be described as Ash Grey. It works with white, black, concrete-effect surfaces and muted fabrics, making it a practical choice for modern apartments, offices and monochrome media walls.

Check the undertone against your floor. A warm grey floor and a cool grey panel can look different once placed side by side, so samples are useful.

Dark Oak: also known as Smoke Oak

Dark Oak creates a deeper, more dramatic wall and is also known as Smoke Oak. It suits larger living rooms, dining spaces, hospitality interiors and media walls where strong contrast is welcome.

Pair it with warm lighting and lighter furniture to keep the room balanced. Vertical LED lighting can emphasise the slat rhythm, but plan wiring and panel cuts before installation.

Black Oak: also known as Charcoal Black

Black Oak is the darkest wood-panel option and may also be called Charcoal Black. It creates a clean architectural backdrop for televisions, artwork and display shelving. In rooms with limited daylight, use it on a focused feature area rather than every wall unless a deliberately dark scheme is intended.

Charcoal Marble is a separate finish

Charcoal Marble should not be confused with Charcoal Black. Charcoal Black is a near-black wood look, while Charcoal Marble has a grey marble-effect appearance. Treat them as two distinct designs when comparing images or placing an order.

How to match panels with common London interiors

Small flats and narrow rooms

White Oak or Grey can keep the wall visually lighter. Continue the same finish across one clear feature plane rather than breaking it into several small sections.

Victorian and Edwardian homes

Walnut and Dark Oak can complement period proportions, fireplaces and warmer furniture. A modern slat wall can sit comfortably beside traditional details when the surrounding palette is restrained.

Media walls

Dark Oak and Black Oak reduce visual distraction around a screen, while Walnut gives a softer residential character. Remember that dark panels can show dust more readily under strong side lighting.

Restaurants, salons and offices

Choose a finish that works with the brand palette and will still look consistent under commercial lighting. Walnut feels welcoming; Black Oak feels graphic; White Oak creates a clean and open effect.

Order the correct finish

Use the primary and alternative names together when confirming an order: White Oak/Premium Oak, Walnut/Light Oak, Grey/Ash Grey, Dark Oak/Smoke Oak and Black Oak/Charcoal Black. This prevents confusion where an invoice, box or supplier reference uses the alternative wording.

Browse the current acoustic wall panel collection and check the product photography for the exact finish available.

Measure before choosing quantity

Once the colour is selected, use our panel calculator or follow the London measuring guide. Ordering the full quantity together helps keep the finish consistent across the wall.

Frequently asked questions

Which colour makes a room look bigger?

Lighter finishes such as White Oak generally maintain a brighter visual effect, although layout, wall colour and lighting have an equal influence.

Is Charcoal Marble the same as Charcoal Black?

No. Charcoal Marble is a grey marble-effect design. Charcoal Black is the alternative name for the near-black Black Oak finish.

Can I mix two panel colours?

Yes, but use a clear design rule such as zoning two adjacent areas. For most feature walls, one consistent finish produces the cleanest result.

Can you help me choose a finish in London?

Yes. Send photographs of the room and its flooring through our contact page. We help customers across London and surrounding areas compare suitable options.

Acoustic Wall Panels vs Soundproofing: What London Homes Need to Know

Acoustic panels and soundproofing are often discussed as if they are the same thing, but they solve different problems. Understanding that difference helps London homeowners, tenants, landlords and businesses choose the right treatment and set realistic expectations before ordering.

Black oak acoustic wall panels used to improve a London room interior

The short answer

Acoustic wall panels improve the sound inside a room. They help reduce echo, reverberation and harsh reflections. Soundproofing reduces sound travelling between rooms or properties. It normally requires a construction system involving mass, isolation, sealed gaps and sometimes insulation inside the wall or ceiling.

Wood slat acoustic panels are an attractive choice when you want a calmer-sounding room and a finished feature wall. They are not, on their own, a complete solution for loud neighbours, traffic noise or music passing through a party wall.

What acoustic wall panels do

Hard rooms with plaster walls, glass, tiles and wooden floors reflect sound repeatedly. That can make conversations feel tiring and television audio less clear. Acoustic backing absorbs part of that reflected energy while the slatted surface helps break up reflections.

This can be particularly useful in:

  • Open-plan London flats with hard floors and large windows.
  • Living rooms and media walls where speech and television clarity matter.
  • Home offices used for video calls.
  • Restaurants, salons, studios and reception areas.
  • Bedrooms where a softer acoustic character feels more comfortable.

What full soundproofing involves

Soundproofing aims to stop airborne or impact sound crossing a building element. Effective systems may use high-density boards, isolation channels, acoustic mineral wool, resilient layers, sealed perimeters and careful treatment around sockets, doors and service gaps.

London properties vary widely. A Victorian terrace with a shared masonry wall presents a different challenge from a new-build flat with lightweight partitions. Before major work, identify whether the problem is voices, bass, footsteps, traffic or building services because each follows a different path.

Can acoustic panels help with noisy neighbours?

They may make the room itself sound less reflective, but they will not normally stop neighbour noise entering through a shared wall. If transmission is the main problem, speak to an acoustic specialist or competent installer about the wall build-up. Decorative panels can then be fitted as the visible finish over a suitable system, provided the installation design allows it.

Acoustic treatment for London home offices

For video calls and recorded speech, treating the wall behind or opposite your desk can reduce flutter echo and improve clarity. Soft furnishings, curtains and rugs can complement wall panels. The aim is usually balanced absorption rather than covering every surface.

Where should panels be placed?

Start with the largest bare reflective wall or the area closest to the main listening and speaking position. A feature wall behind a television, desk, dining area or headboard often combines visual impact with useful acoustic treatment. In larger commercial rooms, several treated zones may perform better than one small decorative strip.

How much of the wall should be covered?

There is no universal percentage because room size, ceiling height, furnishings and use all matter. For a decorative residential project, many customers cover one complete feature wall. For a performance-led room, an acoustic assessment is the best way to specify coverage.

Use our panel cost calculator to estimate a wall quantity, or read our guide on how many acoustic wall panels you need.

Choosing panels for design and comfort

Our acoustic wall panel range includes light, mid-tone and dark wood finishes for homes and businesses across London and surrounding areas. Select the finish in natural daylight where possible and check measurements before ordering.

Frequently asked questions

Are acoustic panels the same as soundproof panels?

No. Acoustic treatment controls reflections within a room. Soundproofing is designed to reduce transmission from one space to another.

Will wall panels make speech clearer?

They can help where excessive echo is reducing clarity, especially when placed on a significant reflective surface.

Can I fit decorative acoustic panels over a soundproof wall?

Often yes, but the fixing method should not compromise the soundproofing system. Confirm the detail with the installer who designed it.

Do you supply acoustic wall panels around London?

Yes. We help customers across London and surrounding areas choose finishes and estimate quantities. Use our contact page for project help.

How to Measure Awkward Walls for Acoustic Panels: London Guide

Windows, fireplaces, alcoves, sloping ceilings and multiple sockets can make an acoustic panel project look difficult to measure. The reliable approach is to divide the wall into simple rectangles, calculate each section separately and plan where cuts and joins will be visible.

Dark oak acoustic wall panels fitted around a London feature wall

Start with a clear wall sketch

Draw the wall as a simple front-facing rectangle. Mark the overall width and height, then add every opening, return and obstacle. Record all measurements in the same unit and label them clearly. Photographs help with planning, but they do not replace accurate dimensions.

For the basic quantity formula, read our main guide to how many acoustic wall panels you need. This article focuses on the extra decisions created by awkward wall shapes.

Split an irregular wall into rectangles

If the ceiling steps or slopes, divide the surface into two or more rectangular areas. Calculate width × height for each rectangle, then add the results. For a triangular section beneath a slope, multiply the base by the vertical height and divide by two.

Keep the panel direction in mind. Full-height vertical panels may span several measured sections, so an area calculation alone does not always produce the most efficient cutting plan.

Measuring around a window

Measure the complete wall first. Then record the window width, height and its distance from the floor and nearest side wall. Large windows can be deducted from the wall area, but the narrow strips above, below and beside the opening often create additional cuts.

Plan the slat rhythm so a narrow unfinished strip is not left at one side. Where possible, balance the cut widths on both sides of the opening. Measure reveals separately if they will also be panelled.

Measuring around a door

Record the door opening and architrave rather than measuring only the door leaf. Decide whether panels will stop at the architrave or replace part of the trim. The section above a door can often be cut from an offcut, but confirm the grain and slat direction before relying on it.

Fireplaces, chimney breasts and alcoves

Treat the chimney breast face and each return as separate rectangles. Then measure the alcove back walls independently. Check heat-clearance requirements with the appliance manufacturer or installer; decorative acoustic panels should not be placed where temperatures or fire-safety rules make them unsuitable.

Because London terraces often have uneven chimney breasts, measure at the top, middle and bottom. Use the largest relevant measurement and expect some on-site trimming.

Media walls and television recesses

Mark the screen, soundbar, sockets, cable routes, shelves and ventilation openings on the sketch. Decide whether the panels continue behind the television or stop around a recess. Planning cables before installation avoids removing finished panels later.

LED channels also need a deliberate position. Confirm the lighting kit dimensions and power location before cutting the acoustic panels.

Sockets, switches and radiators

Measure each fitting from two fixed edges of the wall. Do not rely on a single diagonal measurement. Electrical accessories may need approved extensions or repositioning so they sit correctly on the finished surface; use a qualified electrician where required.

For radiators, measure the visible wall and note brackets, pipework and the gap needed for heat circulation. Follow the radiator manufacturer’s clearance guidance.

How much extra material should you allow?

A simple full wall may need roughly 10% extra for cutting and waste. An awkward wall with several openings, angled cuts or wrapped returns may need more. The correct allowance depends on whether offcuts can be reused while preserving the same slat direction.

Check panel coverage and orientation

  • 240cm × 60cm panel: 1.44m² nominal coverage.
  • 60cm × 60cm panel: 0.36m² nominal coverage.

Area tells you the theoretical quantity. A cutting sketch tells you whether that quantity can actually cover the shapes. Round up to whole panels and do not assume every offcut will fit another location.

Use the calculator, then sense-check the result

Enter the main dimensions into our panel cost calculator. For complex walls, compare the calculator result with your section-by-section cutting plan before ordering.

Get help with an awkward London wall

Send a labelled sketch, measurements and straight-on photographs through our contact page. We help customers across London and surrounding areas sense-check quantities for feature walls, media walls, offices and commercial interiors.

Frequently asked questions

Should I subtract every socket from the wall area?

No. Sockets remove very little area, but they do require precise cuts. Include them in the cutting plan rather than reducing the panel quantity.

Can I use offcuts above a door or window?

Often yes, provided the piece is large enough and the slat direction matches the design.

What if my ceiling height changes across the wall?

Measure at several points, draw the slope and calculate the rectangular and triangular sections separately. Allow extra material for accurate trimming.

Chat with us now